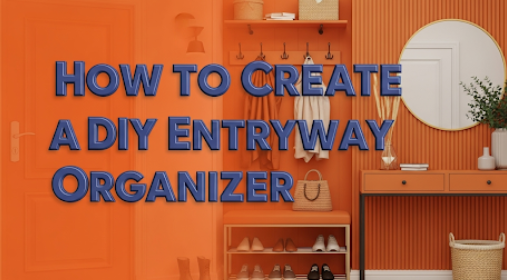
Walking into my home used to feel like navigating through a tornado’s aftermath. Keys scattered on random surfaces, shoes forming small mountains by the door, and my kids’ backpacks claiming territory wherever they landed. Sound familiar? I realized my entryway wasn’t just messy—it was actively working against my family’s daily routine.
That’s when I decided to tackle this problem head-on by creating a custom DIY entryway organizer. After months of research, trial and error, and plenty of weekend projects, I’ve discovered the secrets to building an organizer that actually works for real families. In this guide, I’ll share everything I’ve learned about creating a functional, beautiful entryway that keeps your home organized from the moment you walk through the door.
Why Your Entryway Matters More Than You Think
Your entryway serves as the transition zone between the outside world and your personal sanctuary. I never realized how much this space affected my daily stress levels until I transformed it. Here’s what I discovered about why entryway organization matters:
The Psychology of First Impressions When guests enter your home, the entryway creates their first impression. More importantly, it sets the tone for how you feel every time you come home. A cluttered entryway signals chaos, while an organized one whispers “welcome home” in the most comforting way.
Daily Efficiency Impact I used to waste 15-20 minutes every morning searching for keys, shoes, and essential items. Now, everything has a designated spot, and our morning routine flows smoothly. The time savings alone justified this project for me.
Stress Reduction Benefits Research shows that organized spaces reduce cortisol levels and improve mental clarity. Since organizing my entryway, I’ve noticed I feel more relaxed when I walk through my front door each evening.
Planning Your DIY Entryway Organizer Project
Before I grabbed my tools and started building, I spent considerable time planning. This preparation phase made the difference between a successful project and a weekend disaster.
Assessing Your Space and Needs
Step 1: Measure Your Entryway I measured my entryway’s width, height, and depth three times because accuracy matters when building custom storage. Here’s my measurement checklist:
- Wall space available for mounting
- Floor space for standing organizers
- Ceiling height for vertical storage
- Door clearance requirements
- Traffic flow patterns
Step 2: Identify Your Storage Needs I made a list of everything that needed storage in my entryway:
- Keys and everyday essentials
- Shoes for each family member
- Coats and jackets
- Bags, purses, and backpacks
- Seasonal accessories (hats, gloves, scarves)
- Pet supplies (leashes, waste bags)
- Umbrella storage
- Mail and important documents
Setting Your Budget
| Budget Range | What You Can Build | Best For |
|---|---|---|
| Under $50 | Basic hooks and shoe rack | Renters or minimal needs |
| $50-$150 | Wall-mounted organizer with cubbies | Small families |
| $150-$300 | Comprehensive storage system | Large families or extensive needs |
| $300+ | Custom built-in appearance | Homeowners wanting permanent solutions |
I started with a $200 budget and ended up spending $180, which included some extra materials for future projects. The key is being realistic about your needs while leaving room for unexpected expenses.
Essential Tools and Materials
Tools You’ll Need
Must-Have Tools:
- Drill with bits
- Level (4-foot recommended)
- Measuring tape
- Pencil for marking
- Screwdriver set
- Stud finder
- Safety glasses
- Dust mask
Nice-to-Have Tools:
- Circular saw or miter saw
- Pocket hole jig
- Orbital sander
- Clamps
Materials List
Wood and Hardware:
- Pine boards (1×4, 1×6, 1×8 depending on design)
- Plywood backing (1/4″ or 1/2″)
- Wood screws (various lengths)
- Wall anchors or toggle bolts
- Sandpaper (120 and 220 grit)
- Wood stain or paint
- Polyurethane finish
Storage Components:
- Hooks (coat hooks, key hooks)
- Baskets or bins
- Shoe rack components
- Magnetic strips for keys
- Cork board or whiteboard sections
Step-by-Step Building Process
Phase 1: Design and Planning
I spent two weeks sketching different designs before settling on my final plan. Here’s my design process:
Creating Your Blueprint
- Sketch your entryway to scale
- Mark electrical outlets and switches
- Plan around existing fixtures
- Consider traffic flow patterns
- Design with expansion in mind
My Final Design Elements:
- Upper hooks for coats and bags
- Middle cubby section for shoes and bins
- Lower bench with storage underneath
- Side panel for keys and mail
- Umbrella holder integrated into the design
Phase 2: Cutting and Preparing Materials
Wood Selection Tips: I chose pine because it’s affordable, easy to work with, and takes stain beautifully. For families with heavy use, consider hardwoods like oak or maple, though they’ll increase your budget.
Cutting List for My Design:
- 2 vertical supports: 1×8 x 72″
- 4 horizontal shelves: 1×8 x 30″
- 1 bench top: 1×10 x 32″
- 1 back panel: 1/4″ plywood 32″ x 72″
- Various smaller pieces for dividers and trim
Preparation Steps:
- Cut all pieces to size
- Sand everything with 120-grit, then 220-grit
- Test fit all joints
- Pre-drill screw holes to prevent splitting
Phase 3: Assembly Process
Building the Frame: I started with the main frame because it provides the foundation for everything else. Here’s my assembly sequence:
- Connect vertical supports to horizontal shelves
- Use wood glue and screws
- Check square with a speed square
- Clamp until dry
- Attach the back panel
- Provides crucial structural support
- Ensures the unit stays square
- Creates a finished appearance
- Install internal dividers
- Customize spacing based on your needs
- I created sections for different shoe sizes
- Added adjustable shelves for flexibility
Pro Tips I Learned:
- Dry fit everything before applying glue
- Use clamps to hold pieces while driving screws
- Check for square after every major assembly step
- Sand between coats of finish for smoothness
Phase 4: Finishing Touches
Staining and Finishing: I chose a warm oak stain that complemented my home’s existing woodwork. The finishing process took patience but made a dramatic difference in the final appearance.
My Finishing Process:
- Apply pre-stain conditioner (game-changer for pine)
- Stain with even, long strokes
- Allow 24 hours drying time
- Apply three coats of polyurethane
- Sand lightly between coats with 220-grit
Hardware Installation:
- Coat hooks: 60″ from floor for adults, 48″ for children
- Key hooks: 54″ from floor for easy access
- Shoe rack: 6″ from floor for easy cleaning underneath
Creative Design Ideas and Variations
Space-Specific Solutions
Small Entryways (Under 20 square feet): When space is limited, vertical storage becomes crucial. I helped my sister create a narrow organizer that’s only 8 inches deep but provides storage for a family of four.
Features for Small Spaces:
- Fold-down bench that doubles as storage
- Magnetic strips for keys on the side panel
- Over-door organizers for seasonal items
- Slim shoe cubbies that fit just one pair per slot
Large Entryways (Over 50 square feet): Bigger spaces allow for more comprehensive solutions. My neighbor built an entire wall of storage that looks like built-in furniture.
Large Space Features:
- Full-height storage with upper cabinets
- Integrated seating area with cushions
- Separate zones for each family member
- Display areas for decorative items
Style Variations
Rustic Farmhouse Style:
- Reclaimed wood materials
- Vintage-style hooks and hardware
- Mason jar storage for small items
- Chicken wire backing for a country feel
Modern Minimalist:
- Clean lines with hidden hardware
- Neutral colors (white, gray, black)
- Integrated lighting strips
- Sleek metal accents
Industrial Design:
- Steel pipe frame construction
- Galvanized metal bins
- Edison bulb lighting
- Concrete or metal shelving
Organization Tips That Actually Work
The “One-Minute Rule”
I implemented a family rule: if something takes less than one minute to put away properly, do it immediately. This simple rule keeps our entryway organized without feeling overwhelming.
Zone-Based Organization
My Zone System:
- Drop Zone: Immediate area for keys, phone, wallet
- Coat Zone: Hooks and hangers for outerwear
- Shoe Zone: Organized storage for all footwear
- Bag Zone: Designated spots for purses, backpacks
- Seasonal Zone: Rotating storage for weather-specific items
Family Involvement Strategies
Age-Appropriate Responsibilities:
- Ages 3-5: Put shoes in designated spots
- Ages 6-10: Hang coats and organize backpacks
- Ages 11+: Maintain their assigned section independently
Visual Cues That Work:
- Color-coded sections for each family member
- Picture labels for non-readers
- Height-appropriate storage for independence
- Clear bins so contents are visible
Maintenance and Long-Term Success
Daily Maintenance Routine
My 5-Minute Evening Reset:
- Return items to their designated spots
- Wipe down surfaces
- Check for items that don’t belong
- Prepare for tomorrow’s needs
- Do a quick visual inspection
Seasonal Adjustments
Spring Cleaning Tasks:
- Deep clean all surfaces
- Rotate seasonal items
- Check hardware for looseness
- Touch up paint or stain as needed
Winter Preparation:
- Add extra hooks for heavy coats
- Set up boot drip trays
- Organize winter accessories
- Check weather stripping around storage areas
Problem-Solving Common Issues
Issue: Items Still End Up on Surfaces Solution: I added a “landing strip” tray for items that need temporary placement. It’s easier to clean one designated area than chase clutter around the entire entryway.
Issue: Shoes Multiply and Overflow Solution: Implemented a “one in, one out” policy and added a rotation system for seasonal footwear stored elsewhere.
Issue: Family Members Ignore the System Solution: Made the system easier to use than not use. If something consistently gets ignored, I redesign that aspect rather than fight behavior.
Cost Analysis and Budget-Friendly Alternatives
My Project Cost Breakdown
| Item Category | Cost | Percentage of Budget |
|---|---|---|
| Wood Materials | $85 | 47% |
| Hardware | $35 | 19% |
| Finish/Stain | $25 | 14% |
| Hooks and Accessories | $35 | 19% |
| Total | $180 | 100% |
Money-Saving Tips
Free or Low-Cost Materials:
- Check construction sites for scrap wood (with permission)
- Browse Facebook Marketplace for reclaimed materials
- Visit habitat for humanity ReStore locations
- Repurpose existing furniture pieces
DIY vs. Store-Bought Comparison:
- Store-bought similar organizer: $400-$800
- My DIY version: $180
- Savings: $220-$620
- Customization: Priceless
Troubleshooting Common Problems
Structural Issues
Problem: Organizer Feels Wobbly This happened to me initially because I didn’t properly locate wall studs. Here’s how I fixed it:
- Located studs with a reliable stud finder
- Used 3-inch screws into studs
- Added diagonal bracing for extra stability
- Distributed weight evenly across the structure
Problem: Shelves Sag Over Time Prevention is better than fixing sagging shelves:
- Use thicker boards for long spans
- Add center supports for shelves over 24 inches
- Limit weight per shelf to manufacturer specifications
- Consider adjustable shelf brackets for flexibility
Functional Issues
Problem: Hooks Pull Out of Wall This is usually an anchor issue:
- Use toggle bolts for hollow walls
- Choose anchors rated for 2-3 times your expected load
- Consider backing plates to distribute weight
- Verify wall material before selecting anchors
Problem: Bins and Baskets Don’t Stay Organized Organization systems need to match your family’s habits:
- Choose open containers over closed ones
- Make sure containers are appropriately sized
- Label everything clearly
- Position frequently used items at eye level
Advanced Customization Options
Adding Technology Integration
Smart Home Features I Added:
- Motion sensor lighting for dark mornings
- Charging station for devices
- Bluetooth speaker for music while getting ready
- Smart hooks that alert when keys are forgotten
Expandable Design Elements
Future-Proofing Your Organizer:
- Design with adjustable shelves
- Plan for changing family needs
- Use modular components when possible
- Consider seasonal storage rotation
Decorative Enhancements
Personal Touches That Make a Difference:
- Family photos in the display area
- Seasonal decorations that rotate
- Plants that thrive in your lighting conditions
- Artwork that reflects your family’s personality
Real-World Results and Lessons Learned
Before and After Impact
Time Savings:
- Morning routine: 20 minutes faster
- Evening cleanup: 15 minutes faster
- Weekend reorganization: Eliminated entirely
Stress Reduction:
- No more frantic key searches
- Guests compliment our organized space
- Family members take ownership of their areas
Unexpected Benefits:
- Increased property value
- Better shoe longevity (proper storage)
- Reduced cleaning time throughout the house
What I’d Do Differently
Lessons from My First Build:
- Plan electrical needs earlier – I wished I’d added outlets for device charging
- Consider lighting from the start – Added battery-powered LED strips later
- Make adjustability a priority – Fixed shelves limit future changes
- Invest in better hardware – Cheap hooks needed replacement within a year
Family Feedback
My family’s honest assessment after six months:
What They Love:
- Everything has a designated spot
- Morning routines are smoother
- Friends notice and compliment our organization
- Less arguments about lost items
What Could Be Better:
- More hooks for guest coats
- Deeper shoe storage for boots
- Better lighting for evening use
- More space for seasonal decorations
Environmental Impact and Sustainability
Eco-Friendly Material Choices
Sustainable Options I Considered:
- Reclaimed wood from old barns
- Bamboo plywood for backing
- Low-VOC stains and finishes
- Recycled hardware when possible
Environmental Benefits:
- Reduced need for plastic storage solutions
- Longer-lasting than mass-produced alternatives
- Supports local lumber suppliers
- Customization reduces waste from poor-fitting solutions
Energy Efficiency Considerations
LED Lighting Integration:
- Battery-powered strips eliminate wiring needs
- Motion sensors prevent lights being left on
- Timer functions for automatic shut-off
- Daylight sensors adjust brightness automatically
Safety Considerations
Child Safety Features
Important Safety Measures:
- Rounded corners on all surfaces
- Secure mounting to prevent tipping
- Non-toxic finishes only
- Appropriate height for children’s reach
- No sharp edges or protruding hardware
Adult Safety Considerations
Design for All Ages:
- Good lighting prevents trips and falls
- Comfortable reaching heights
- Stable construction for leaning support
- Non-slip surfaces where appropriate
Professional vs. DIY Comparison
When to Call a Professional
Consider Professional Help For:
- Complex electrical work
- Structural modifications
- Built-in appearance requirements
- Limited DIY experience or tools
DIY Advantages
Why I Chose DIY:
- Complete customization control
- Significant cost savings
- Personal satisfaction from building
- Ability to modify and expand later
- Learning valuable skills
Skills You’ll Develop:
- Basic carpentry techniques
- Finishing and staining
- Hardware installation
- Problem-solving abilities
- Project planning and execution
Conclusion: Your Organized Entryway Journey
Creating my DIY entryway organizer transformed more than just my entryway—it changed how my entire family approaches home organization. The project taught me that custom solutions often work better than store-bought alternatives because they’re designed specifically for your space and needs.
The $180 I invested in materials paid for itself within months through time savings alone. More importantly, the daily stress reduction and improved family routines made this one of the most impactful home improvement projects I’ve ever undertaken.
Key Success Factors:
- Thorough planning before building
- Choosing quality materials within budget
- Involving the whole family in the design process
- Building flexibility into the system
- Maintaining realistic expectations
Your Next Steps:
- Measure your space carefully
- Assess your family’s specific needs
- Set a realistic budget and timeline
- Gather tools and materials
- Start with a simple design
- Build in phases if needed
- Celebrate your success
Remember, the perfect entryway organizer is the one that works for your family’s lifestyle. Don’t be afraid to modify designs, experiment with different solutions, and make adjustments as your needs change. The goal isn’t perfection—it’s creating a functional space that supports your daily routines and brings peace to your home.
Your organized entryway is waiting, and with the right planning and effort, you can create a space that welcomes you home every single day. Start small, think big, and enjoy the transformation process. Trust me, your future self will thank you every time you walk through that door.
For more home organization inspiration, check out our guides on [mudroom storage solutions], [small space organization tips], and [seasonal storage strategies]. You might also find helpful resources at Better Homes & Gardens, This Old House, and Family Handyman for additional project ideas and techniques.